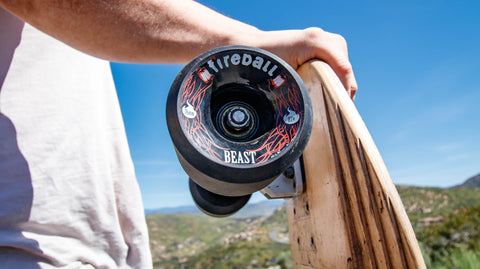
Over time dirt and gunk will build up on the inside of your bearings and cause the internal ball bearings to slow down. If you feel that your skate bearings are spinning slowly, unevenly, or are making any noise, it may be time to clean them.
Cleaning your longboard or skateboard bearings takes about 20 minutes (even for beginners) and can greatly prolong the lifespan and performance if done periodically and correctly.
That being said, sometimes bearings are beyond repair. It’ll be your call, but we recommend replacing the entire set if any rust or corrosion is present on any of your bearings (with the best skateboard bearings on the market, of course). Generally, if rust is present on one bearing, there are probably contaminants or small patches of rust on other parts, which will spread like cancer through the bearing. At this point, no amount of cleaning is going to fix the bearings. At that point, it’s best to start fresh.
If a bearing is seized, you should absolutely replace it. A seized bearing can pose a threat to your safety from the excess heat buildup. This is due to increased friction when attempting to roll. Too much heat and friction will cause the bearing can collapse while you’re riding, or the core of your wheels to melt. Say hello to road rash.
Cleaning Skate Bearings: What you will need…
1 - A Cleaning Kit- Bones Reds Cleaning Kit
- Oust Speed Kleen Kit
- Household alternative: Toothbrush & bowl
- You can also make your own
- Citrus-Based Cleaner (this is included if you bought the Oust Speed Kleen Kit)
- Household alternative: Dish soap
4 - Towel
- Microfiber Shop Towel
- Paper Towels
- That one towel that you stole from the hotel
5 - Razor blade, pin or small paper clip
6 - 5/16" bit or skate tool for removing wheels from trucks

The Cleaning Process:
Step 1 / The Surgery
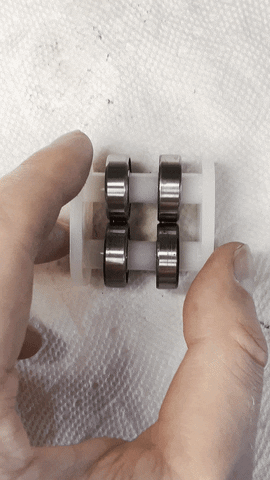
Before we begin, we’re going to assume you have not removed the bearings from the skateboard wheels. To do this, unscrew the axle nut on each side of the skateboard truck with your skate tool or 5/16” socket wrench. Slide off each speed washer (keep them safe) and remove wheels. Once the wheels are off, use the axle to remove the bearings with just your skate tool as shown in this video
Ok, now we’re ready to rock... First, we need to disassemble your bearings.
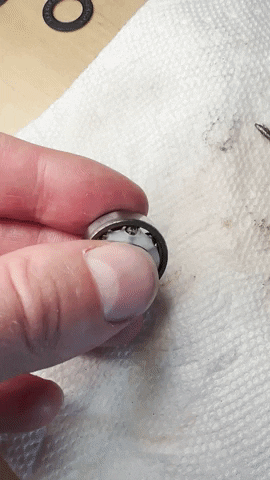
Wipe off the dirt that’s on the outside of your bearings with the towel or paper towel. If you have a rubber bearing shield, take a razor and slip it between the shield and the inner race ring. Pry up to pop off the shield. Be careful not to damage your bearing shield or slice your hand.

If you have a metal bearing shield, take a pin and pry out the C ring that is between the bearing shield and the outer race ring. Tap the bearing face down on the table to get the shield off.
Some metal bearing shields are not removable. If you can, remove one shield. If no shields are removable, then it is probably best to just get new bearings.
After the shields are off, on one side you should see a plastic looking thing over the steel balls. This is called the nylon retainer (or cage - see below). Use your pin or razor to pry it out of the bearing. You don’t want the retainer in there with the cleaning solution. Set all of this aside for reassembly.

If you open the bearing shields and inside there is a metal cage, you cannot remove it. Just clean the bearings with this on.
Step 2 / Set up your Cleaning Kit
Skateboard bearing cleaning units mostly all have the same basic design of a bottle with an axle(s) inside the cap to attach your bearings. For this, remove the wing nut or end cap from the bottom of the axle and take off the spacers. If you have something like the Oust Kleen Kit with clip-in plastic spacers, simply pop them apart.
If the cleaning kit did not include spacers, you can use the spacers from your normal setup. However, if you use normal sized skateboard bearing spacers instead of the included spacers, you may not be able to clean all of your bearings at once because normal spacers are larger.
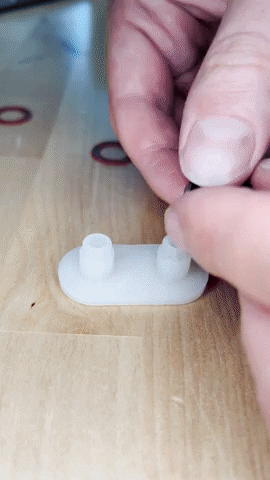
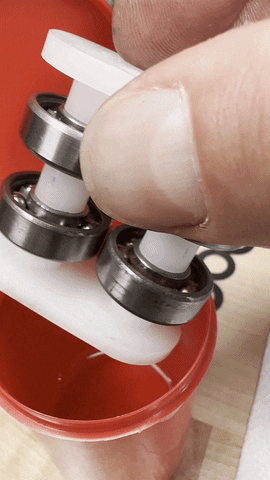
Put your bearings and spacers on the axle, alternating between bearing and spacer. Secure the bearings and spacers on the axle with the wing nut or end cap.
Household item alternative: Toothbrush
If you’re on a budget, you can use an old toothbrush to dig deep into the bearings and remove the dirt and debris from the inside. Grab yours and move to step 3.
Step 3 / Bearing Cleaning Solution
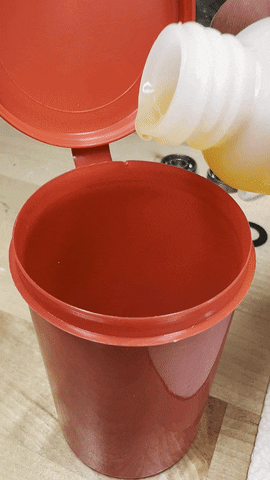
Fill the container about 1/4th of the way with bearing cleaner. Insert the bearings into the bottle and secure the lid. Shake the container vigorously like a shake weight to start breaking apart the dirt and gunk stuck to the bearing. This is a very important part of the technique. The cleaning solution should get dirty and nasty.
Household item alternative: Dish Soap!
If you do not already have a citrus based cleaning solution and do not wish to purchase one, you can use dish soap to remove that grime from your bearings. It won’t damage your bearings as other products might, but we still recommend the natural citrus based cleaner. Make sure to fully remove any soap reside before moving to the next step.
You can also use a non-water-based solvent like rubbing alcohol or nail polish remover (isopropyl alcohol), acetone or mineral spirits. Personally, we like to avoid these whenever possible due to the harsh chemical nature. If you do go this route, be sure to wear gloves and avoid getting it on your skin.
Step 4 / Towel Dry
Open the lid over a towel and take off the lid. Carefully remove the bearings and set the container of cleaner to the side. Take the wingnut or end cap off the axle & put the clean bearings onto the towel. If using something like the Oust Kleen Kit, you can start by rolling it dry. Then dry each bearing, spacer, and the axle with the towel or paper towel.
If there is a lot of residue on the bearings, they can be washed with water. This sounds counter-intuitive, but as long as the bearing does not sit with water in it for an extended period of time, it will not rust. Make sure to dry the bearings super well with a hair dryer or heat gun and apply lubricant immediately.
Pro Tip: Save your cleaning solution. You can use a coffee filter or fine strainer to filter out the bearing dirt from the cleaning solution in order to re-use the clean solution next time.
Step 5 / Reassembly & Re-lubricating
Put the nylon retainer back into the bearing by spacing out the balls and popping it in. Put one shield back onto the bearing as well. Rubber shields pop back on with a slight press. Be very careful not to bend the shields.
To re-attach a metal shield, place the shield onto the bearing and push the c-ring circlip back into place.
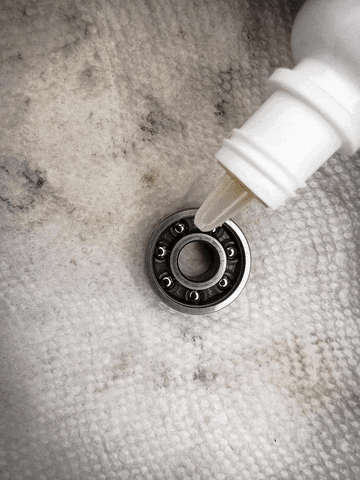
Place the bearing with the open side up and drip bearing oil / lube inside. About 2-5 drops of bearing lube should be enough. Too much lube can actually slow the bearing. Re-attach the other bearing shield and reinstall on the skateboard.
Note: DO NOT use motor oil, WD-40, or petroleum jelly as we have seen suggested on some guides online. This will leave you with dry bearings and 20 minutes of wasted time.
And there you have it! How to fully clean your skateboard bearings in 5 easy steps. If you have any questions, throw a comment below, otherwise head over to the skatepark and give your fresh bearings a spin.